Chocolate Benchmarks
Why chocolate benchmarks? While browsing web sites last year I came across some silicone molding compounds that I thought would be fun to play with. I wasn’t sure what to use them for, but it occurred to me that it might be fun to make molds of benchmarks, and then create chocolate treats.
Then I started thinking (as did others around the same time, as evidenced by this Geocaching.com forum thread) that a similar process could be used to make a mold of a mark still in its setting if there was something special about it. (Or if you’re really into it and have a lot of spare time, I suppose you could make a mold of every mark you find and start a collection.) Here is the process I used to create my chocolate benchmarks.
1. Find a Benchmark
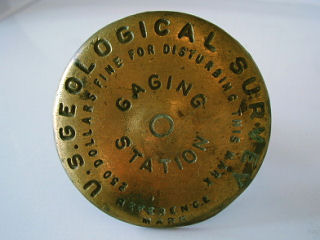
This may be the hardest part! I happen to have quite a few survey mark disks of various types, most of which are unused disks I acquired from surveyors or others in related fields. One was a Destroyed mark that had to be removed from its setting. I also have several 1-inch replica pins such as can be ordered through Mountainclimb.com. You may even want to modify the process and capture impressions of marks in the field.
The disk I’m using for my demonstration was never used in the field. It was sent to me by a USGS employee with whom I’ve corresponded on an urban exploration forum.
Make sure the disk is clean before making the mold.
2. Make the Mold
Possible molding materials abound, depending on how much time you have to make the mold, what you plan to do with it, and how long you’d like to keep it.
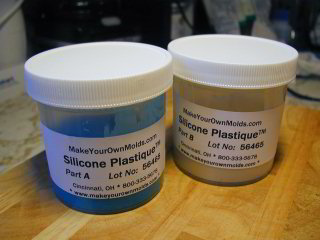
I chose Culinart’s Silicone Plastique, a food-safe silicone molding compound, because I planned to use the molds for chocolate and other goodies. I also liked the fact that the silicone will produce flexible molds that are heat- and cold-resistant. [2025 edit: It appears that Silicone Plastique is no longer available, but any food-grade mold making silicone putty like EasyMold should work just as well.]
a. Measure the molding compound
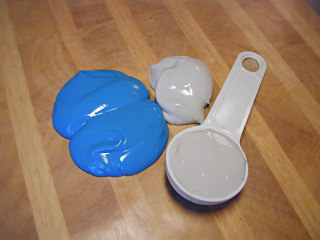
For this four-inch disk, I used approximately 2.5 tablespoons of each component. The catalyst (blue) and base (dull white) need to be mixed in equal parts.
b. Mix it together
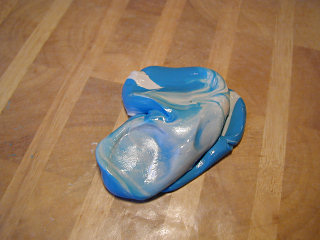
The components need to be mixed until a uniform light-blue color is reached. I do this slowly so I don’t introduce too much air into the mixture. Once the two are mixed, you’ve got about twenty minutes to work and an hour until the silicone fully cures. It’s sticky, so I lined the board with waxed paper.
c. Fill in the details

It’s best if you fill in the fine details first with a thin layer. Be sure not to trap air bubbles beneath the silicone.
An offset spatula might help, or just use your fingers.
d. Complete the mold
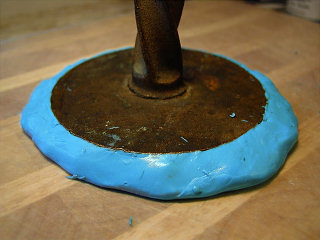
Form a ¼-inch thick patty from the remainder of the silicone and press the mark down into it. Then smooth the sides of the mold up to conform to the edges of the mark.
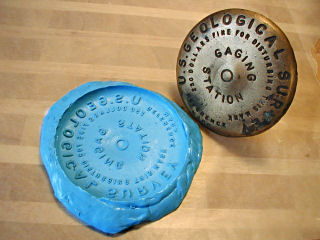
Let it sit for at least an hour for the silicone to cure, then peel away the mold. (Test it first by trying to press a fingernail into the outer edge of the mold, just to make sure it has solidified.)
3. Make the Chocolates
a. Melt the chocolate
For the best appearance and taste, buy real chocolate and learn how to temper it. Did I do this? No, at least not yet. I used quick-melting candy wafers that are available in most arts & crafts stores.
If you’re using candy wafers, just follow the manufacturer’s directions. Generally they’ll melt in a few seconds in the microwave. Or if, like me, you don’t have one of those newfangled contraptions, they’ll melt equally well in a double boiler. And if, like me, you don’t have a real double boiler, you can make one out of a shallow metal bowl set atop a deep pot half-filled with simmering water. You’ll figure it out.
b. Fill the mold
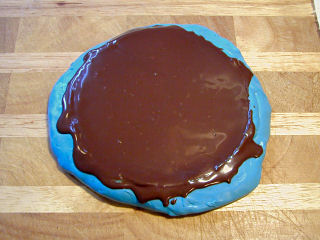
Pour the melted chocolate slowly into the mold. Lifting the mold a few inches and dropping it on the counter several times will help release any air bubbles that may have formed.
As you can see, some chocolate spilled over the sides. It’s very easy to remove the excess after the chocolate hardens.
c. Chill and unmold
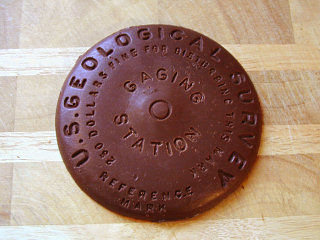
Refrigerate 20-30 minutes or until chocolate has hardened, and then pop out your chocolate benchmark! They go very well with tea and shortbread cookies.